
Google Tag Manager is a tool recommended by a search engine Google that helps more businesses to optimize their digital marketing efforts. It enables marketers to easily add and manage tags on their websites, without modifying the code. With Google Tag Manager, website owners can quickly and easily track website visits, measure conversions, and analyze user behavior. In addition to that , it provides businesses to customize its tracking codes for specific campaigns and events. By using Google Tag Manager in conjunction with Google Analytics, businesses can gain valuable insights into customer behavior and can also take more changes in the SEO strategies.
What is Google Tag Manager?
Google Tag Manager helps webmasters to manage their website tags easily and efficiently. It is an all-in-one tag management system that allows users to quickly and easily add, update, and manage website tags without editing HTML or JavaScript code. With Google Tag Manager, users can easily track user behavior on their websites and use the data to optimize their marketing campaigns.Also, it can be used to deploy tracking codes for third-party services such as Google Analytics and AdWords. By using Google Tag Manager, marketers can save time while ensuring accuracy in their website tagging efforts.
How to Use Google Tag Manager for Effective Digital Marketing?
Google Tag Manager (GTM) is a marketing analytics tool that can help you track and measure the performance of your digital campaigns. It allows you to quickly and easily set up tracking for websites, apps, and other web-based properties. With GTM, marketers can gain valuable insights into how their campaigns are performing and make data-driven decisions to optimize their marketing efforts.

GTM tracking provides marketers with detailed web analytics data such as pageviews, bounce rates, conversions, and more. This data can be used to refine marketing strategies and improve campaign performance. GTM also allows marketers to quickly set up advanced analytics setups such as A/B testing or funnel analysis. By using GTM, digital marketers can accurately measure their results and make informed decisions about their campaigns.
Steps to Implementing Google Tag Manager For Maximum Results
Google Tag Manager (GTM) is a powerful tool that can help you to track and optimize website performance. It allows you to quickly add tags and tracking codes to your website without having to manually edit the code. Implementing GTM can be time consuming process, but with the right steps, it can be done quickly and easily. We will discuss of setting up the new account, creating tags, triggers, variables and testing your setup for maximum results. With these five steps, you’ll be able to make sure that your website is properly tagged and ready for optimization.
-
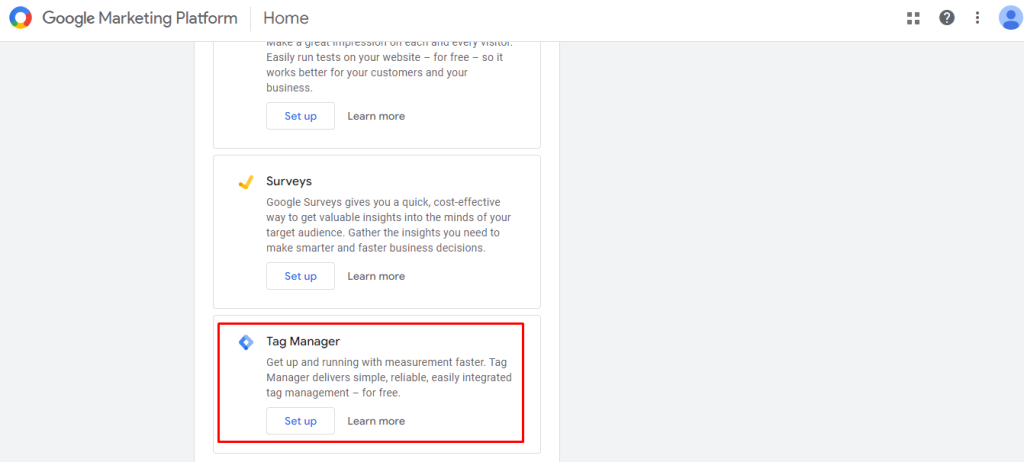
Create an Account
First step is creating a Google Tag Manager account. You will need a Google account for this, so if you don’t already have one, create one now. Once logged in, go to tagmanager.google.com and click “Create Account” at the top right of the page.
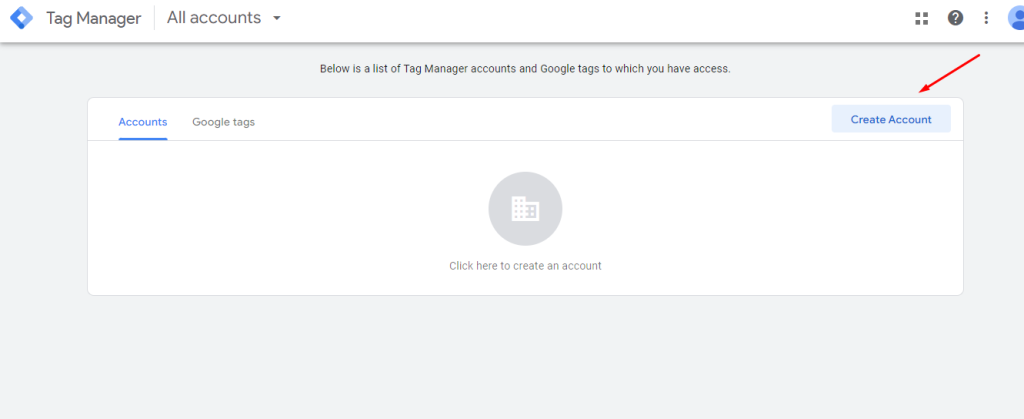
Fill out all required information such as name of your organization or business and URL of where GTM will be used before clicking “Continue” at the bottom right corner of the page.
-
Set Up Your Container
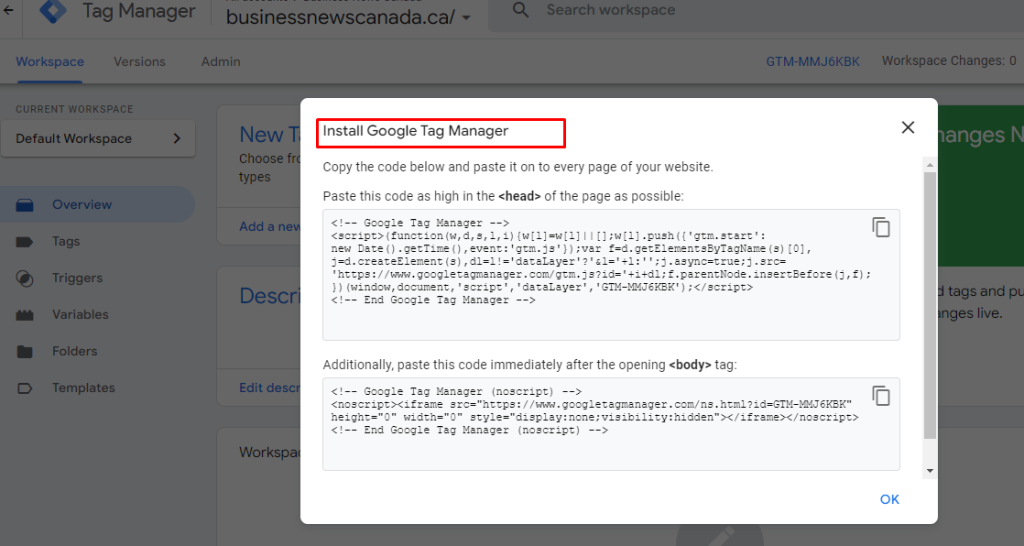
After creating an account, set up your container by selecting either web or mobile app depending on what type of platform you are using for your website or application development project respectively; then enter a name for your container before clicking “Create” button at the bottom right corner of the page again .
This will generate two snippets which should be added into every webpage/app screen that needs tracking – one snippet goes into <head> section while other goes just after opening <body> tag on each page/screen respectively .
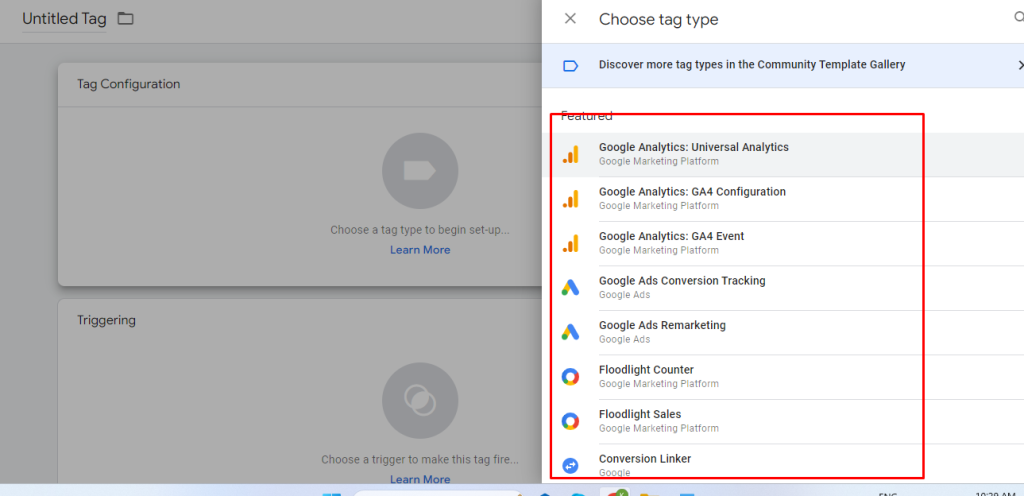
- Add Tags
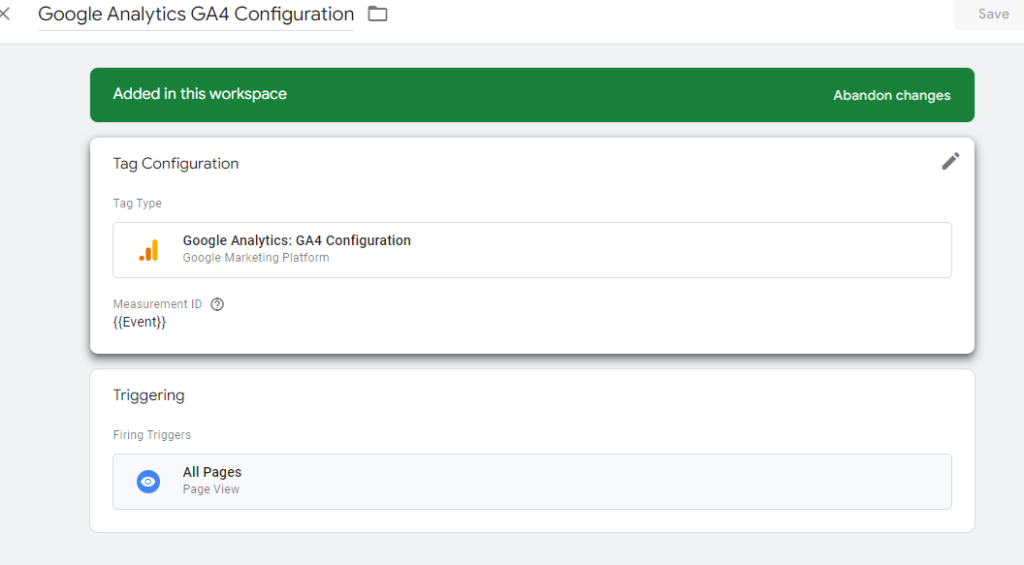
Now it’s time to start adding tags! Go back into GTM dashboard and select “Tags” from left side menu bar; here you’ll find various types of tags available like Adwords Conversion Tracking, Facebook Pixel etc., choose appropriate tag according to requirement & fill out necessary details like conversion ID / pixel ID etc., before saving changes made.
Add Triggers to activate your tags. You need to set up triggers to tell Google Tag Manager when to fire your tags. Click on “Triggers” in the sidebar and select “New Trigger“. Follow the prompts to create a new trigger.
- Publish Changes
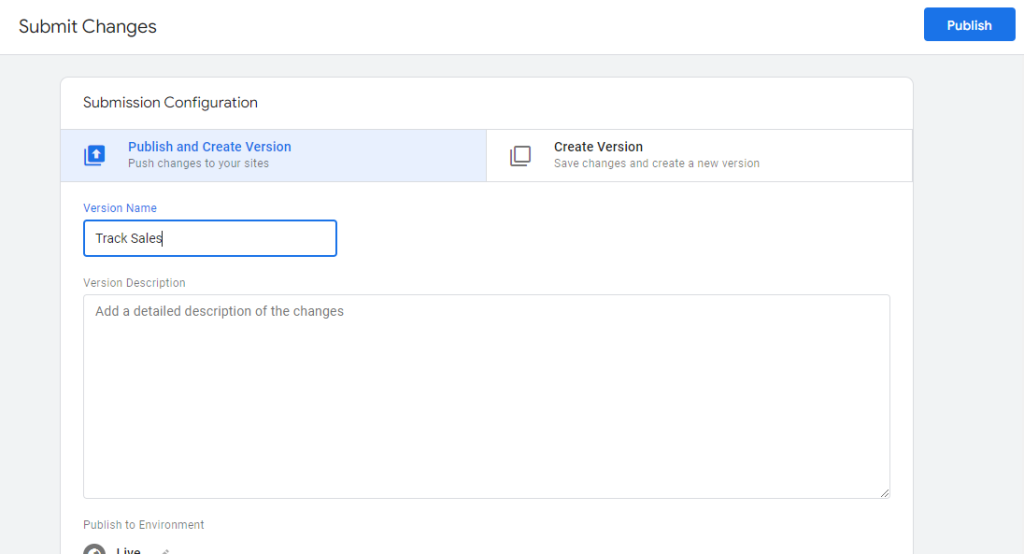
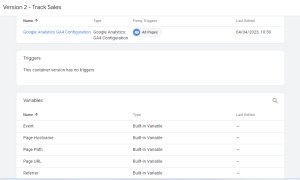
Once all desired tags are added & configured properly , its time publish them live onto webpages/apps screens ; simply click “Publish” button located at top right corner & confirm publishing action by entering description about changes being made along with version number (optional) – this way any future modifications can easily tracked down !
- Test Everything Out
Make sure all newly implemented tags are working correctly by visiting pages/screens where they were placed & verifying data collected through respective analytics platforms like Google Analytics / Facebook Ads Manager etc., If something doesn’t seem quite right then double check configuration settings once more before making any further adjustments.
Final Words
Setting up Google Tag Manager is an important step in website optimization and analytics. With the help of GTM, you can easily add and manage tags on your website without having to manually edit the code. It also allows you to track and measure user interactions, which can be used to gain insights into how your site is performing and what changes need to be made. By following this guide, you should now have a better understanding of how to set up Google Tag Manager for your website.
